
How to Print Logistics Labels
Print logistics labels from packing, from a product or from a volume, choosing the Logistics category and a template.
The logistics label is the one that travels with the volume to its destination: it carries the SSCC, the delivery point, the carrier and the shipping reference, in a GS1-compatible format.
You can print it at three different moments. In all of them the format comes from the logistics label Template — what changes is where you start.
After finishing Packing
- Go to Shipping Orders in the Outbound section of the sidebar.
- Open the order whose packing is already finished.
- Select the Packing Orders tab.
- Select Print Volume Labels on the packing order, or Generate All Labels for the parent volumes.
- Check the label data and select Print.
Note: packing must be finished — before that there are no volumes to label.
From a product
-
Go to Products in the Entities section of the sidebar.
-
On the product's row, open the actions menu and select the print label button.
-
Under Label Category, choose Logistics.
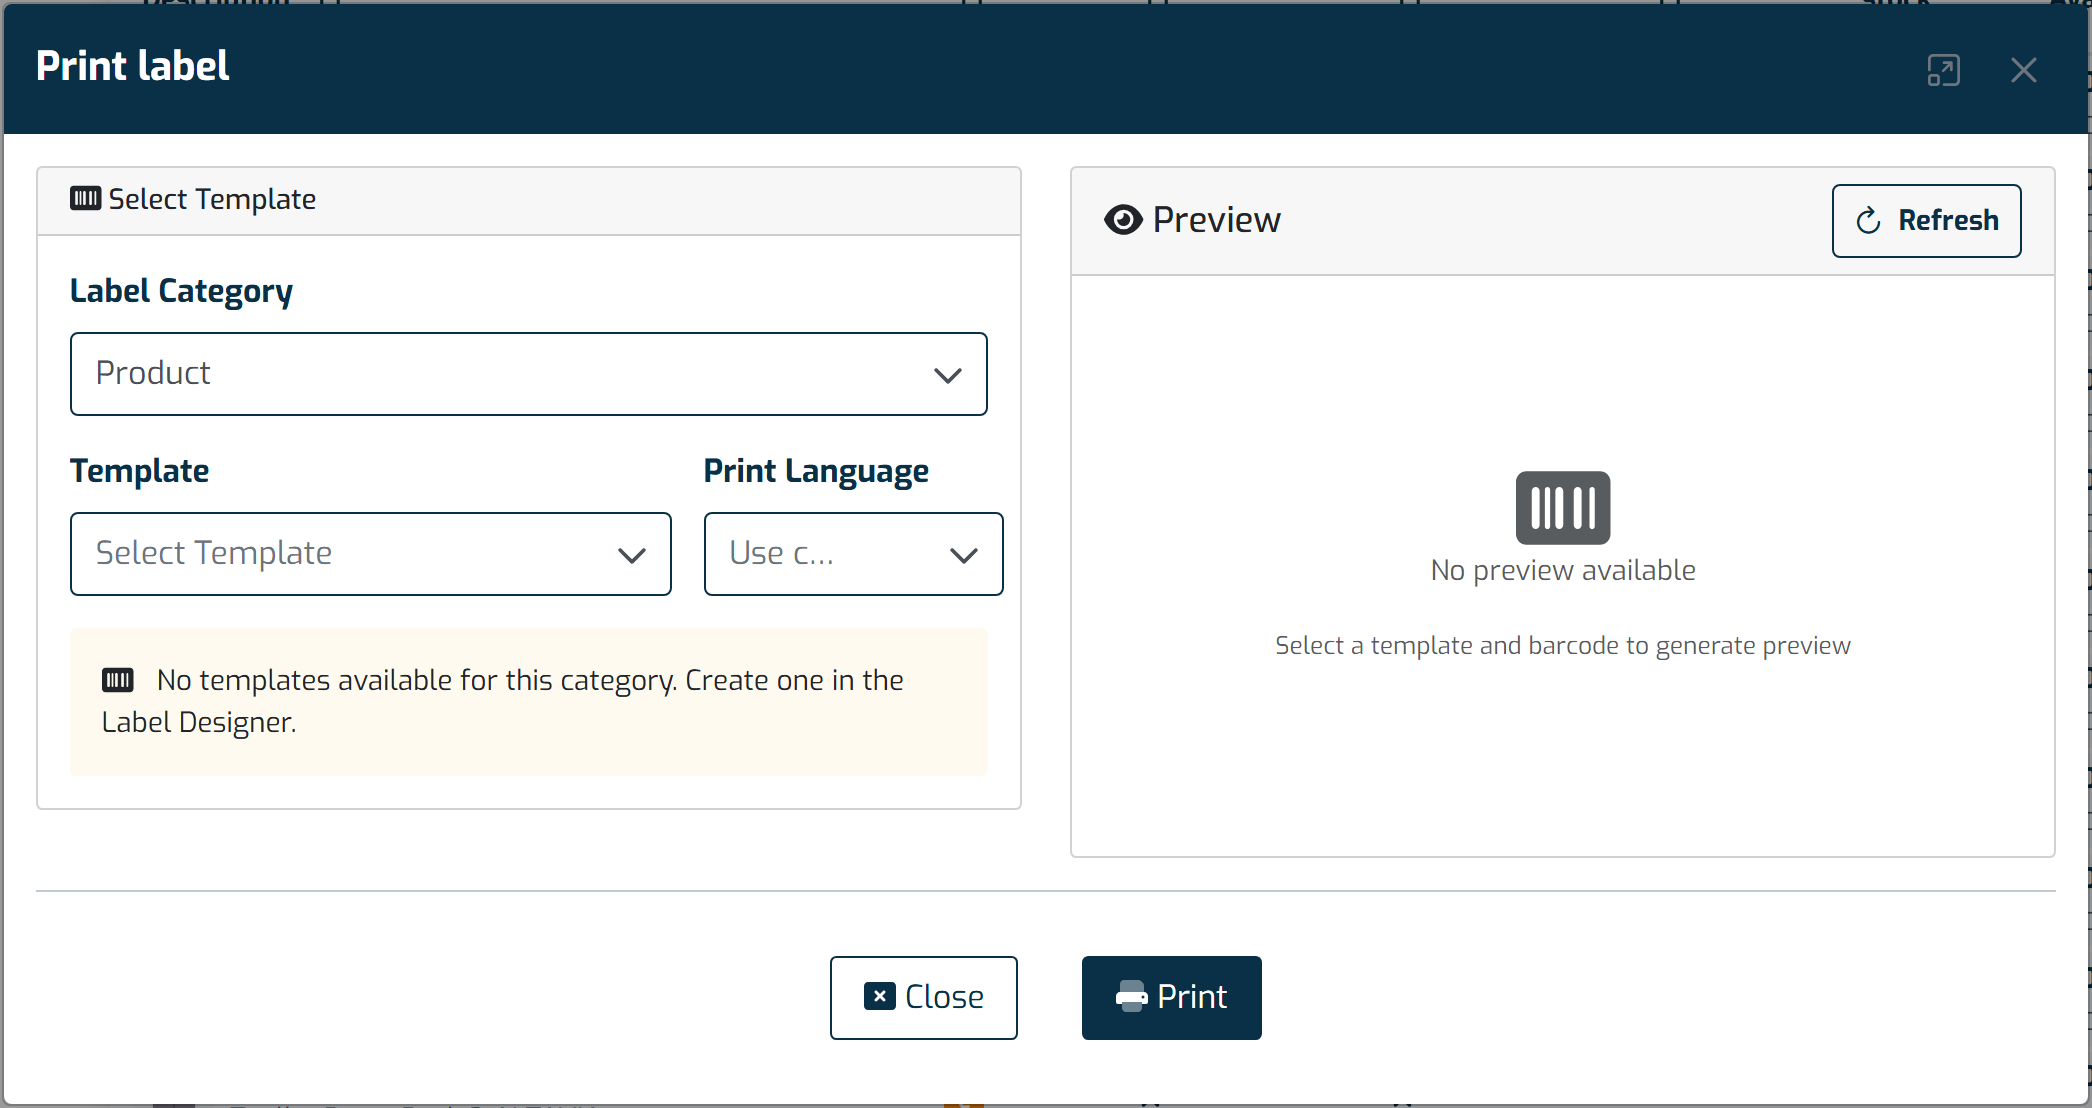
The same dialog prints product labels and logistics labels — what changes is the Label Category you pick at the top. -
Choose the Template and fill in the logistics data: SSCC, volume number, carrier and shipping reference.
-
Select Print.
From a volume
-
Go to Volumes in the Entities section of the sidebar.
-
Click the volume icon to open its actions menu and select the print button.
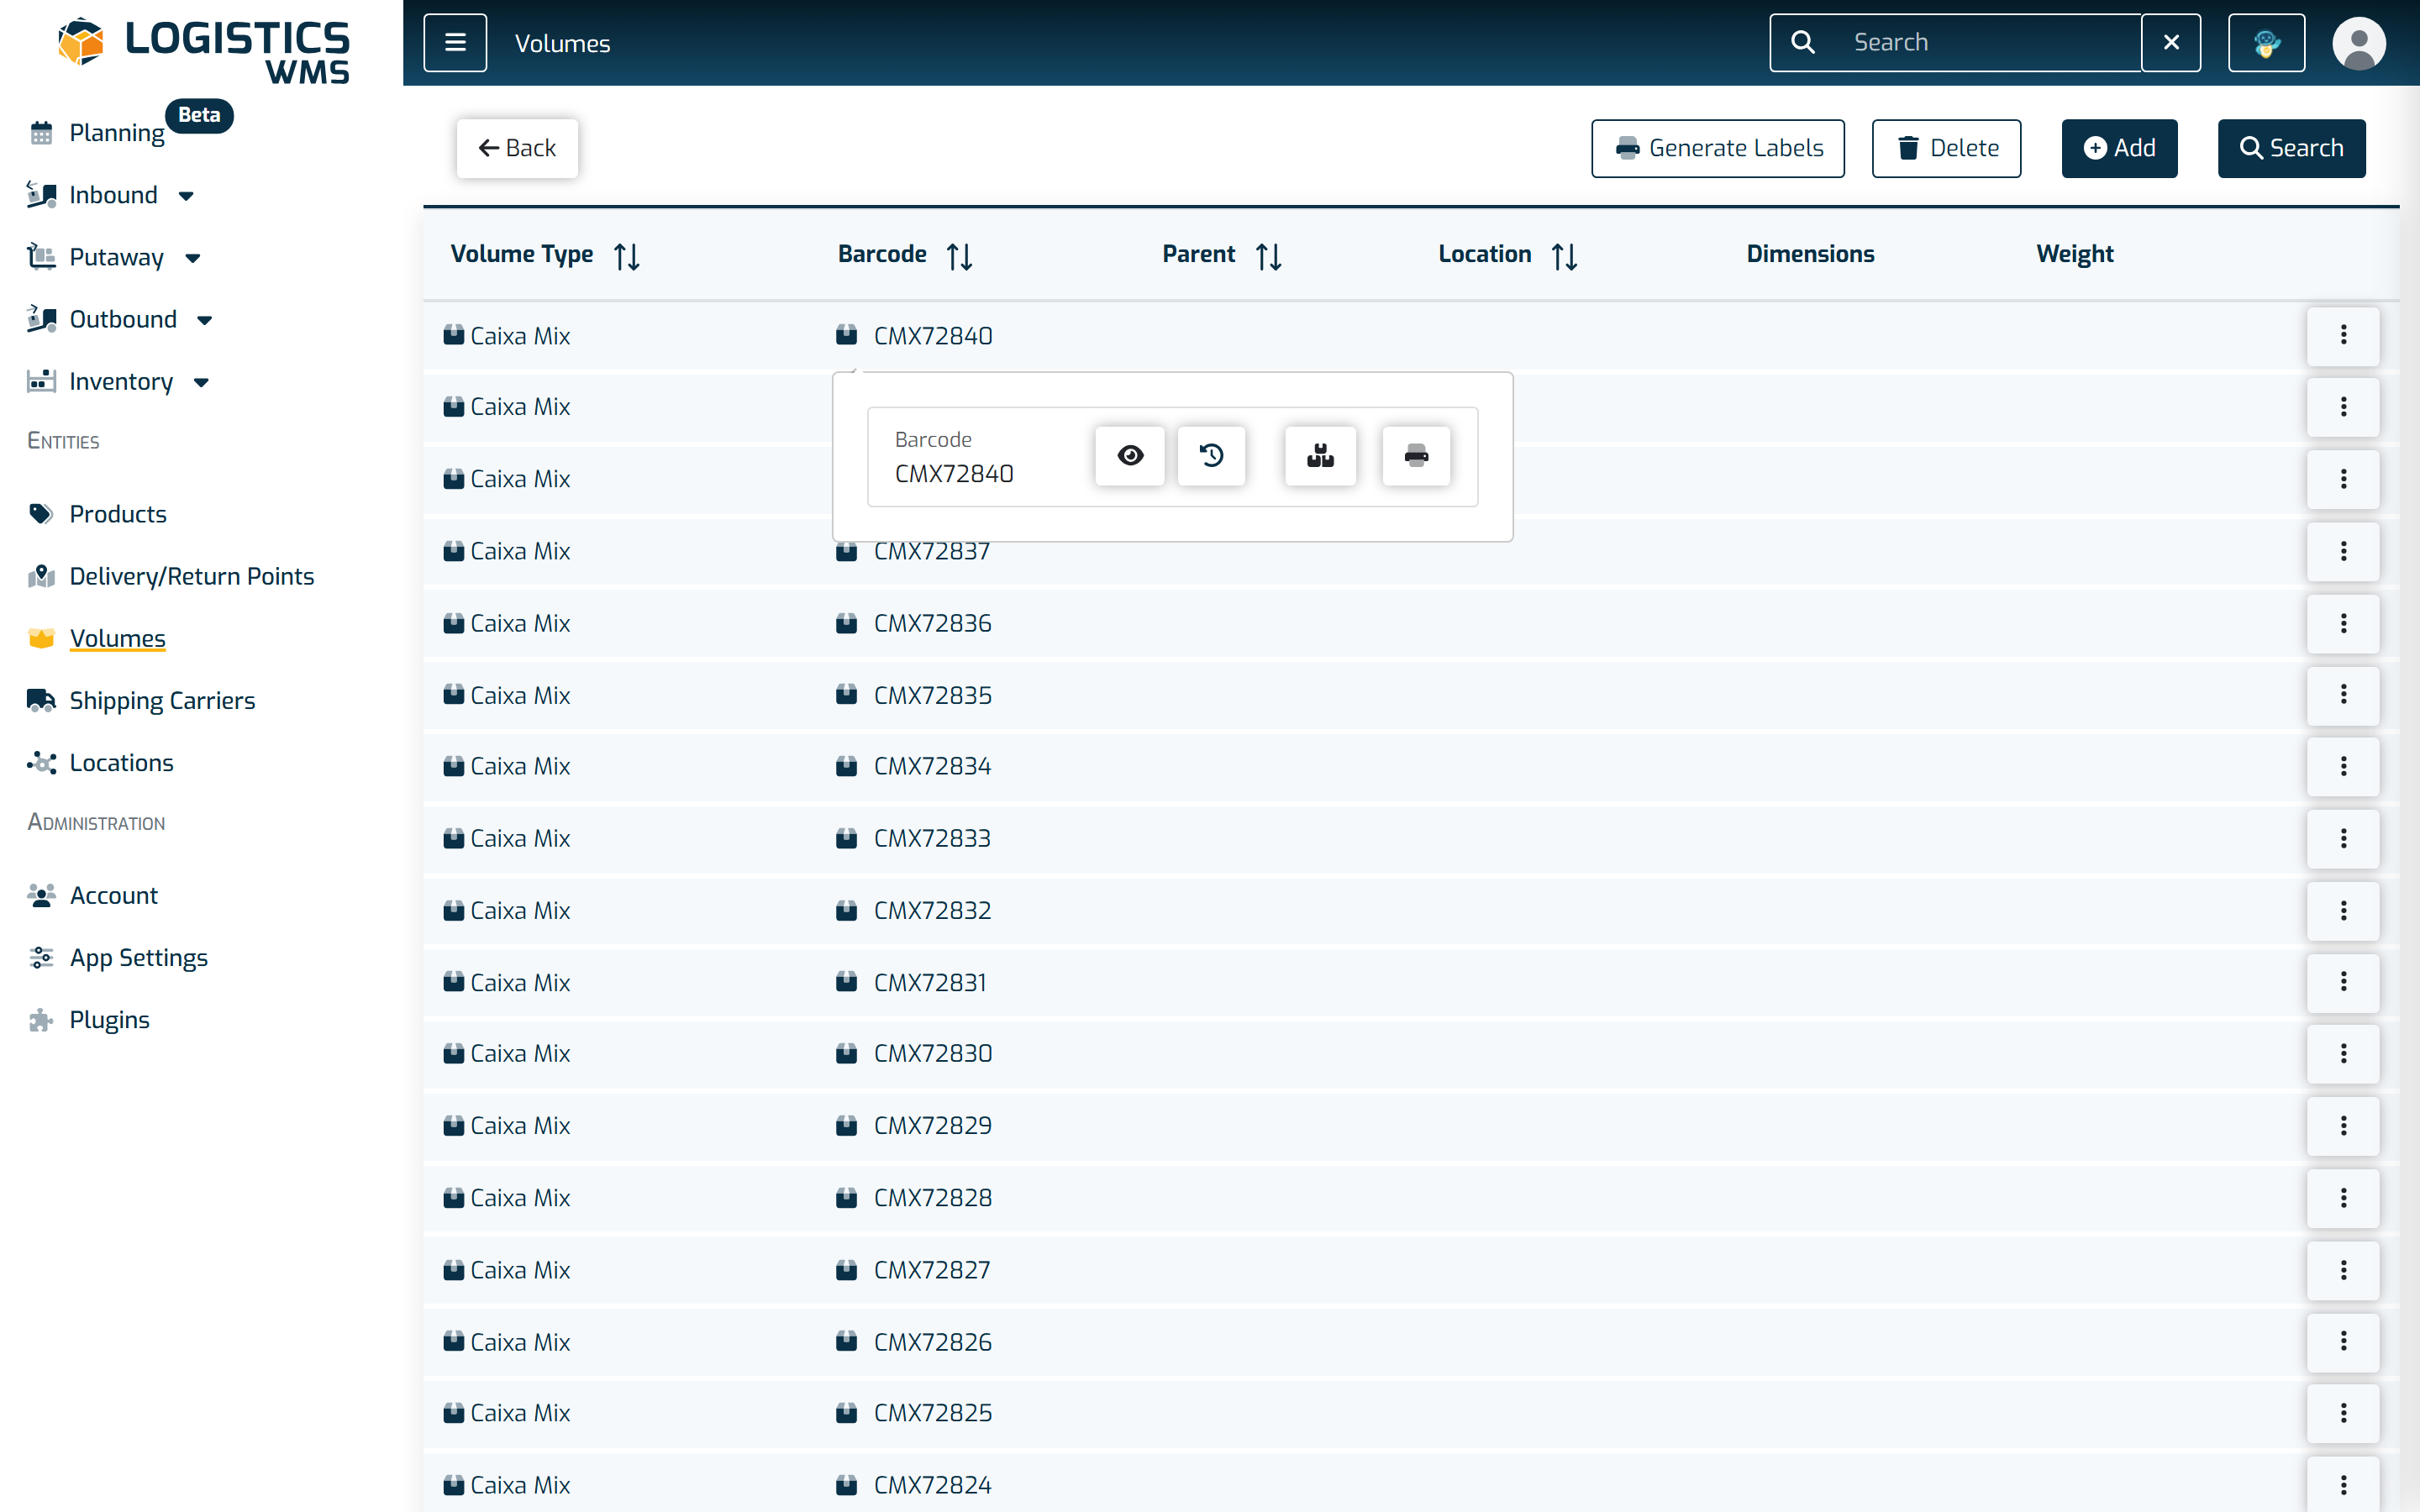
Clicking a volume icon opens this actions menu, available on any screen where volumes appear. -
Under Label Category, choose Logistics.
-
Choose the Template, check the data and select Print.