
How to generate Physical Location labels?
Generate storage location labels in bulk or one at a time, choosing the label template and the print language.
Location labels identify each position in the warehouse with a barcode, so an operator can scan to confirm they are in the right place before putting away or picking.
The barcode type and label size are no longer chosen at print time: they come from the Template you select. A template is designed once and reused for every print job, so here you only decide which one to use.
In bulk
-
Go to Locations in the Entities section of the sidebar.
-
Open the Storage Locations tab.
-
Select Generate Labels.
-
Under Template, choose the location label template you want to print.
-
To leave the description off the label, turn off Show Location Description.
-
Under Print Language, choose the label language, or leave Use current language.
-
In the table on the right, select the locations you want to label. The header checkbox selects every location on the page.
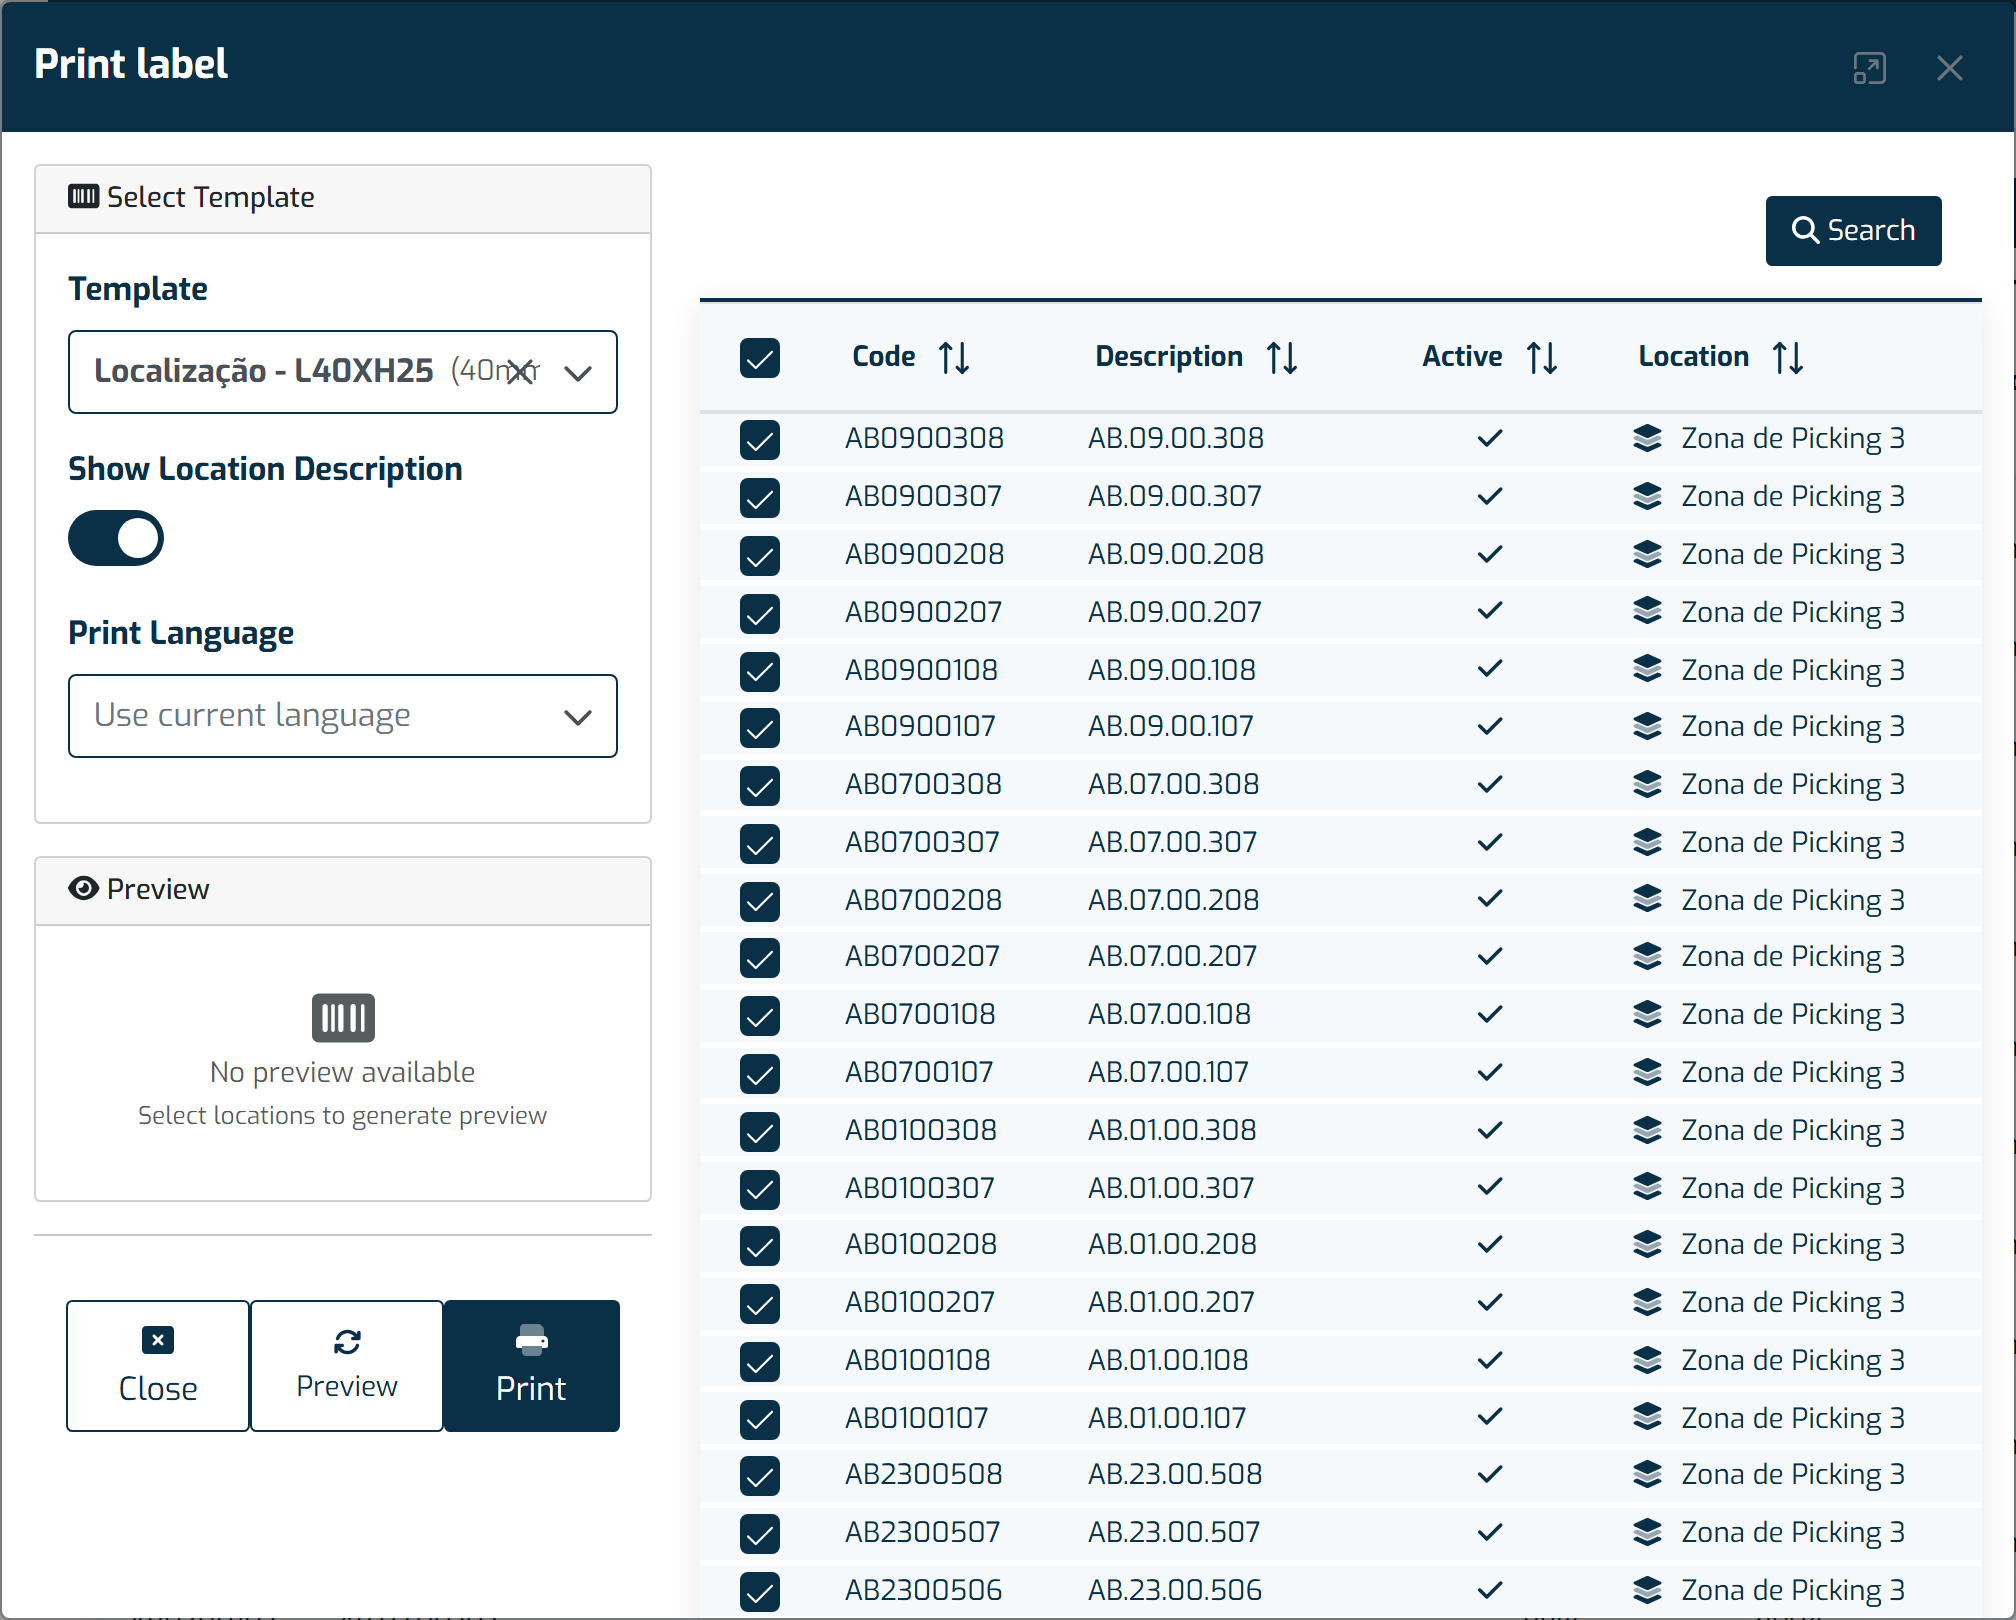
The bulk generation dialog no longer asks for a barcode type or size — you pick a label Template and the print language. -
Select Preview to check the result before printing.
-
Select Print. A PDF is generated with one label per selected location.
One location at a time
- On the Storage Locations tab, open the actions menu on the location row.
- Select the print label button.
- Confirm the Template and the remaining options, then select Print.