
How to Create a Delivery/Pickup Point?
How to create pickup and delivery points to link addresses to customers, suppliers and carriers, and keep them separated per client.
- Access the 'Delivery/Pickup Points' menu, available in the Entities section of the side menu.
- Select '+ Add.'
- Fill in the relevant information:
- Name
- Tax Identification Number (TIN)
- Type (Customer, Supplier, B2C - End Consumer)
- Active
- Trade Name (fantasy name or brand)
- GLN (Global Location Number)
- Category
- Address
- Postal Code
- City
- Country
- Select 'Save.'
Note: The configuration of the 'Reserve items for dispatch with a minimum validity of' field should only be filled in if the Dispatch Guides created in LogisticsWMS do not contain the Batch. In such cases, this field should be filled with the number of days or months to be considered for the automatic assignment of Batches, aiming to improve the automatic allocation criteria of Batch stock. This configuration can be done at the general application level, customer level, and Dispatch Guide level.
Address book
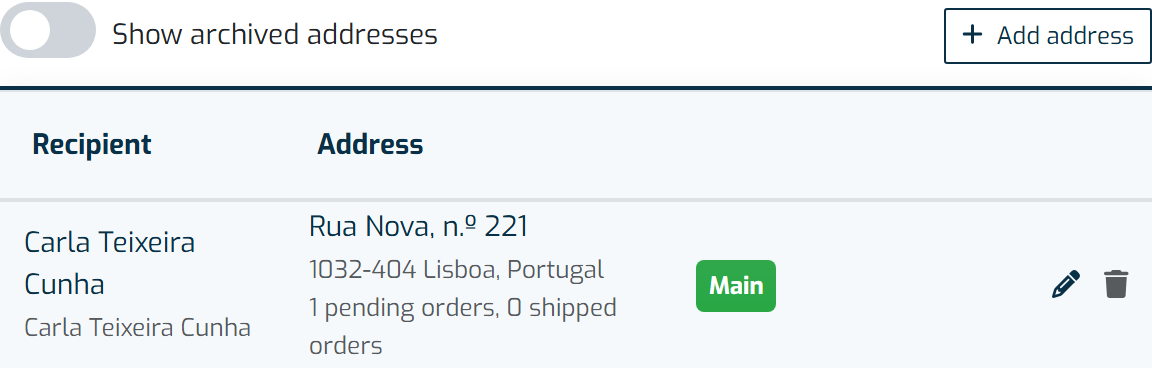
Every Delivery/Pickup point has its own address book, in a tab on its profile: it stores more than one address, marks which one is main, and keeps the rest available as alternatives.
Instructions:
- Open the Delivery/Pickup point and go to the Address tab.
- Select '+ Add' to store a new address, or use each row's actions to edit or delete an existing one.
- Use 'Make main' on an alternative address to promote it — the app tells you how many pending shipping orders, receptions and reception notes will move to it; any that have already shipped or been received keep the address they were created with.
- An address replaced by a promotion is archived, visible behind its own filter, only for as long as some document still points to it.
A shipping order, reception or reception note stores the address it was created with — not a live reference to the Delivery/Pickup point. So changing a point's main address never changes what has already shipped or been received; it only affects new documents from that point on. The lists for these documents let you see and filter by each one's address.
Note: Delivery/Pickup points can be created automatically if you are using LogisticsWMS integrated with another software. When the order comes from an online store (Shopify, WooCommerce, PrestaShop, Jumpseller or Shopkit), the delivery point is matched to that store's customer, and the order's address is saved into its address book — as a new address if it doesn't already have one, never overwriting an earlier order's address.
Assigning delivery points to a client
If your account manages stock for several clients, each Delivery/Pickup point can belong to one of them, and the application uses that ownership to keep clients apart.
Instructions:
- Open the Delivery/Pickup point and set the Client it belongs to.
- On receptions, reception notes and shipping orders, choose the Client first | it is the first field on the form.
- The Delivery/Pickup point list then only shows the points belonging to that client. If you change client, the delivery point is cleared, so you never keep one from the previous client.
- Select 'Save.'
Note: when you have a client selected in the top bar (working "as" that client), the client field on the form is locked to it. Once a client is chosen, delivery points with no client assigned are no longer listed.
Note: saving a reception, reception note or shipping order whose delivery point belongs to a different client is rejected with an error message. The same validation applies to orders created through the client portal.