
How to perform a Receiving Process?
Note: All fields can be entered manually or read from 1D or 2D barcodes with properly configured equipment. See more in the Scanners section.
A reception is the moment goods stop being a promise on paper and become stock. Until it has been checked in, what the supplier says they sent and what is actually on the pallet are two different things — and it is the check-in that decides which of the two gets recorded.
The process has two halves, usually done by different people: someone prepares the reception at a computer, and someone checks the goods in on the warehouse floor, with a handheld.
First: prepare and release
Receptions live under Inbound → Manage receptions.
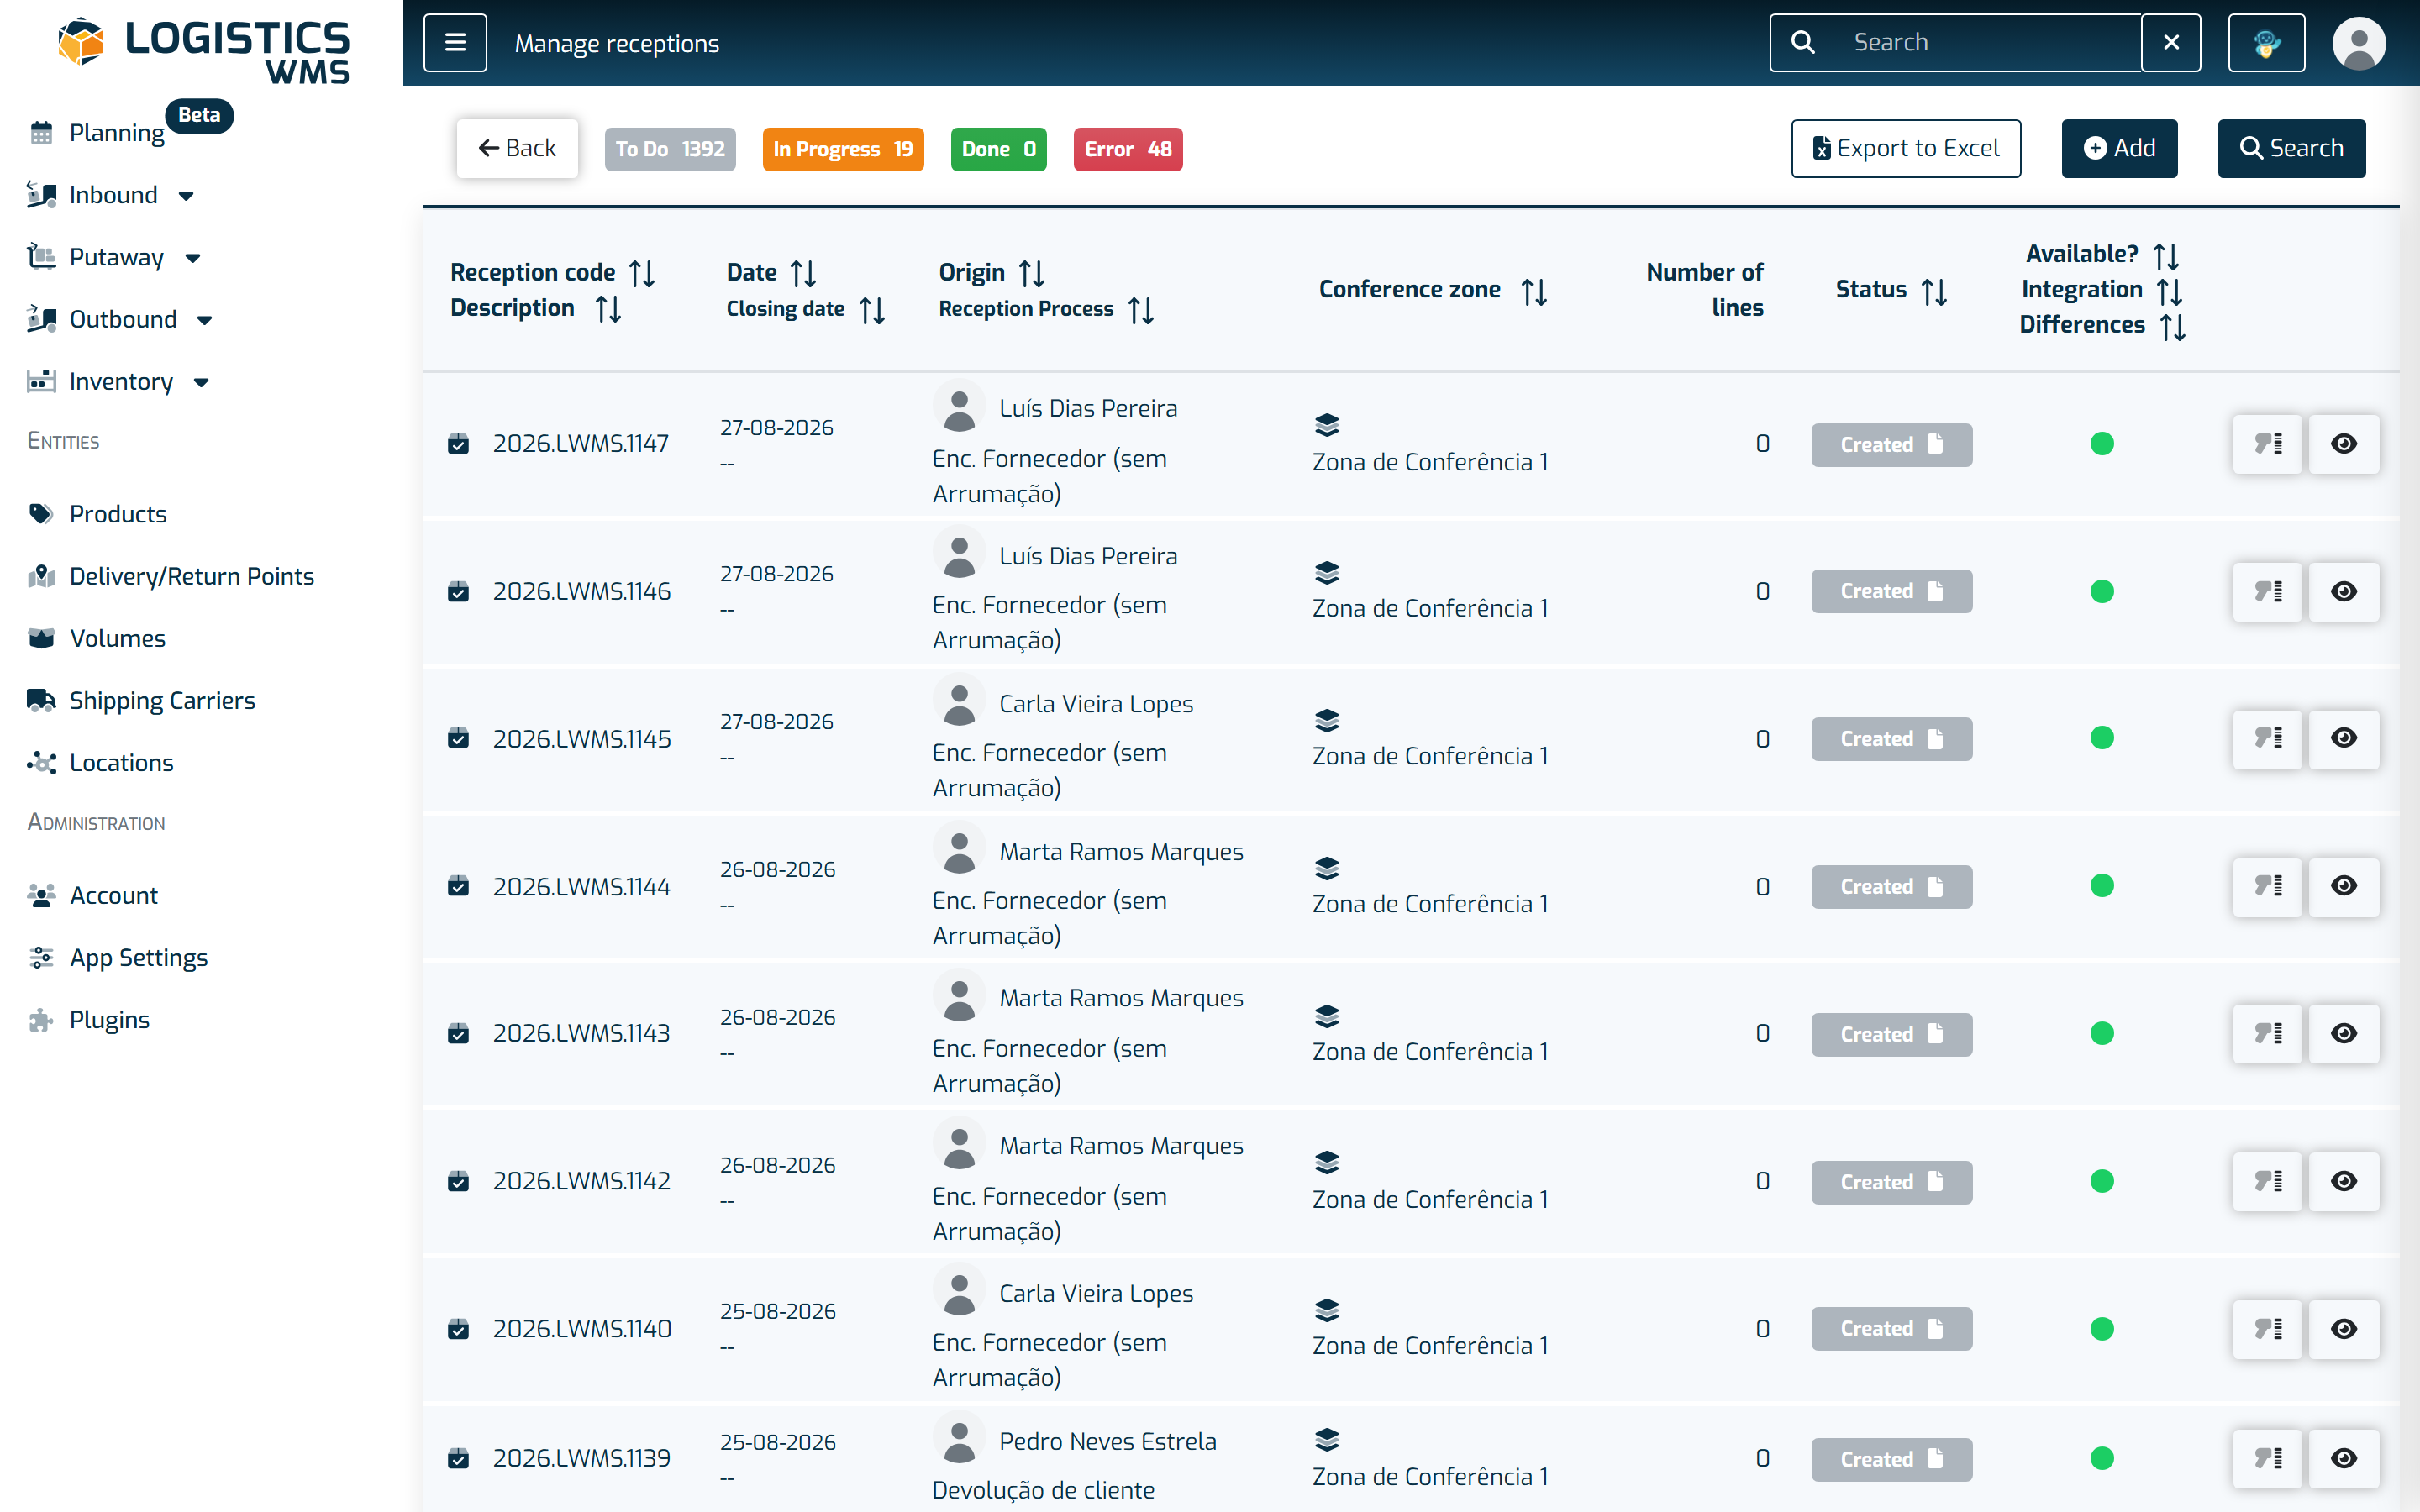
The four cards at the top are the day's summary and double as filters: To Do, In Progress, Done and Error. If anything is in Error, that is where to start.
Look at the Available? column on the right: that circle decides whether the reception ever reaches the handheld of the person checking it in. While it is red the reception exists, but nobody in the warehouse can see it. Click it to release the reception — it turns green and appears on the floor's list.
This step is easy to forget, and the symptom is always the same: someone reports that a reception "isn't showing up" on the handheld.
Two more columns are worth confirming before you release:
- Reception Process — this decides, among other things, whether the goods are put away immediately or wait in the checking area;
- Conference zone — where the goods will physically be checked in.
Then: check the goods in
Whoever is in the warehouse opens Inbound → Perform Reception. This list shows only what is still outstanding, which makes it much shorter than the management one.
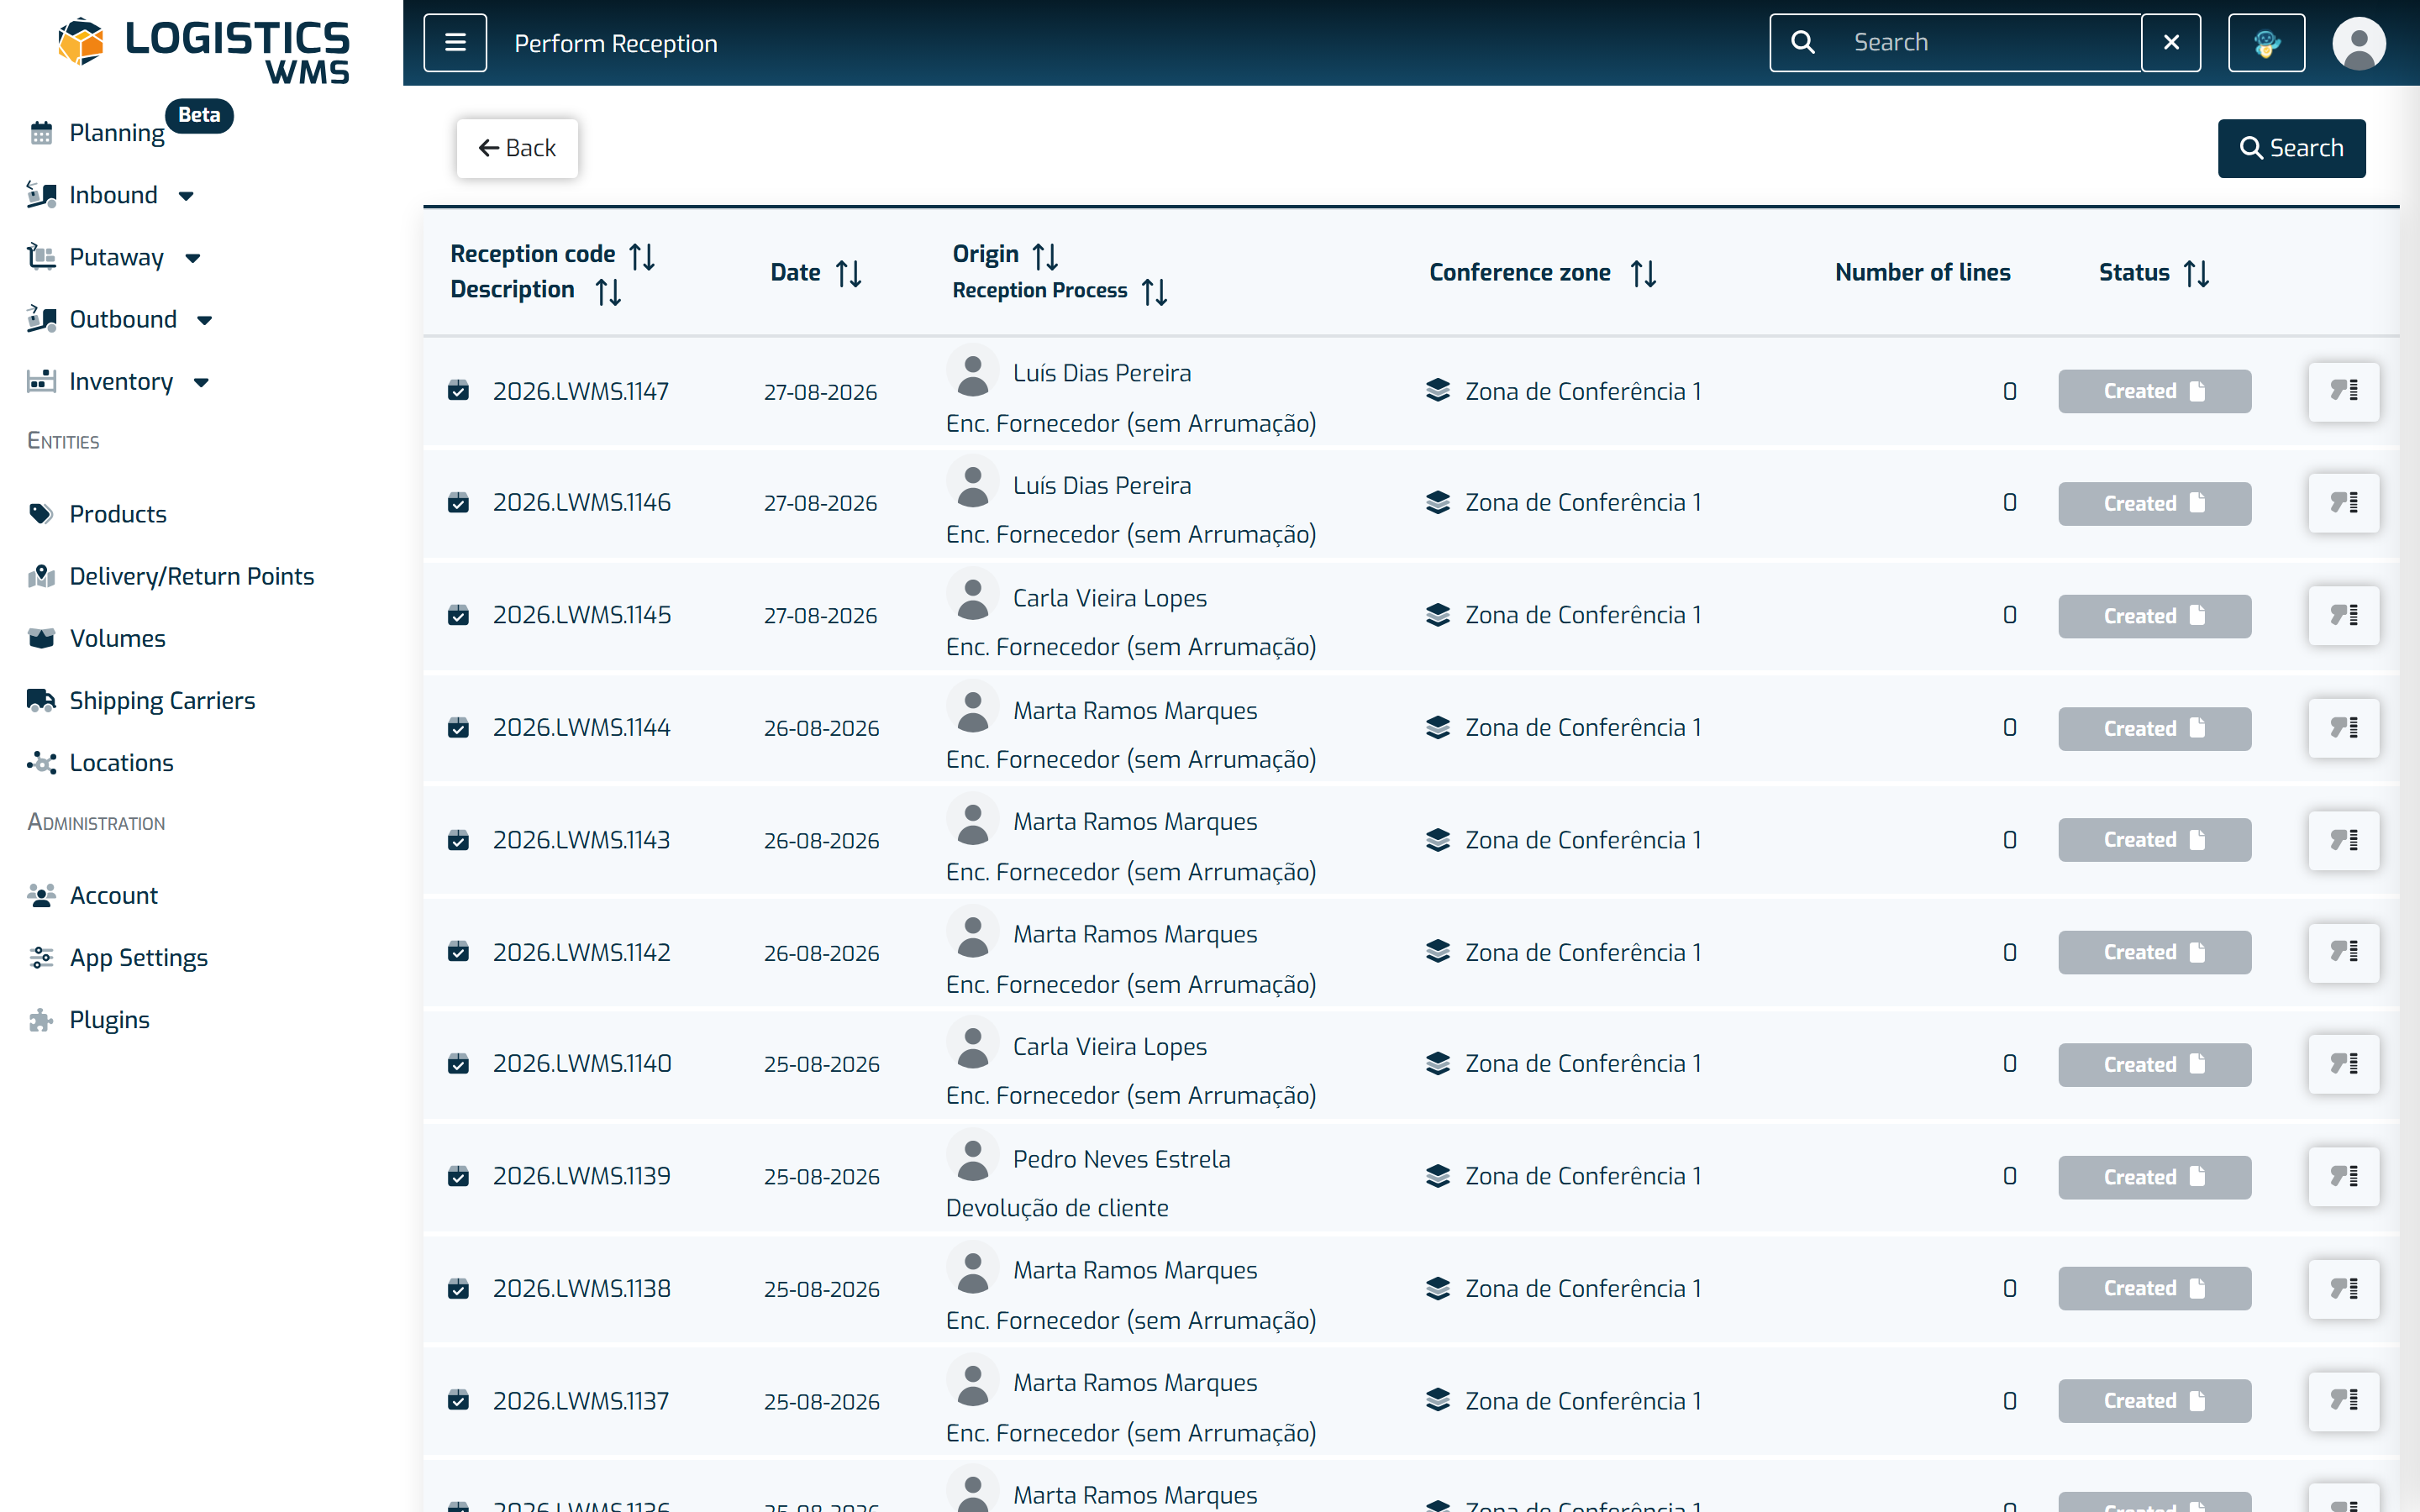
The button at the right of each row starts the check-in. From there the screen guides you, line by line:
- Confirm the location where you are receiving.
- Scan the product's barcode. If you scan a volume's code first, the product you scan next is automatically placed inside that volume.
- Enter the lot, if the product is lot-managed.
- Confirm or correct the expiry date.
- Enter the serial number, if the product requires one.
- Enter the quantity.
- If this is a reception with putaway, say where the product is going — a physical location or a volume.
- Confirm the line, with the Confirm button or the Enter key.
Repeat from step 2 for each product. When there is nothing left to check, choose Finish.
That last step is the one that counts: only on finishing do the checked quantities enter stock and start appearing in the product's movements. Until then, nothing you scanned has changed the inventory.
Note: every field can be typed by hand or read from 1D or 2D barcodes, with the equipment configured. See more in the Scanners section.
Things to watch out for
Before performing your first reception, some configuration should already be in place:
- Unloading Location and Conference zone created;
- Quality Statuses created (damaged or expired, for example);
- The "Inbound" settings, under the "Settings" menu.
In a 3PL warehouse, also confirm the reception has a client attached — that is who the goods will be assigned to.