
How to Perform a Putaway
Learn how to run a putaway in LogisticsWMS: pick the instruction, scan the product and confirm the destination location for the goods.
A reception ends with the goods sitting on the floor of the conference zone. Putaway is what comes next: taking what arrived and placing it where it will live. Until that happens the stock exists in the system but nobody knows where it is — and an item nobody can find is worth the same as an item you do not have.
The Putaway menu is for exactly that, and not only after a reception: use it whenever goods need to move, whether you are reorganising the warehouse, freeing up a location, or consolidating what got scattered.
You can put away four combinations:
- Products into physical locations;
- Products into volumes;
- Volumes into physical locations;
- Volumes into volumes.
Whichever it is, the screen asks the same four questions, in this order: from where, what, how much and where to.
1. Where you are taking it from
Open Putaway in the side menu. The first question is the origin.
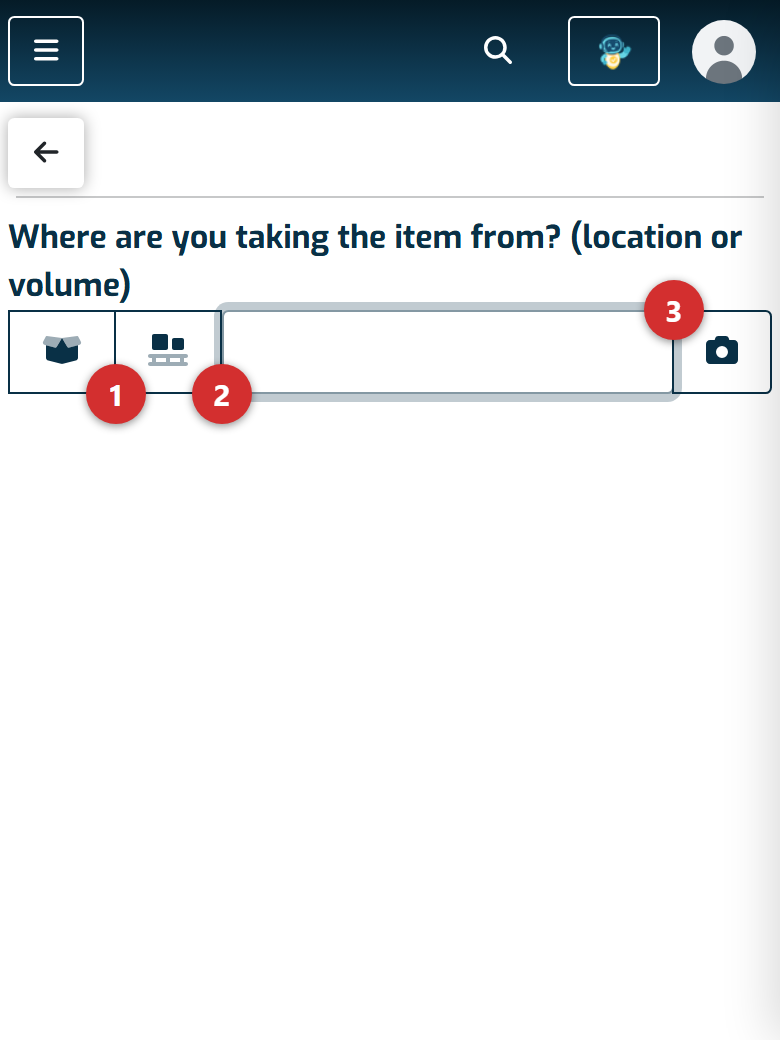
- The first icon says the origin is a volume — a pallet, a box, a container.
- The second says it is a physical location — a shelf, a floor space, an unloading bay.
- The field takes the code from the scanner, or typed by hand.
Choosing the type before entering the code is not optional: without it the screen does not know where to look and the scan goes nowhere. If a correct code appears to do nothing at all, this is almost always why.
This is the screen as it appears on a handheld, which is where putaway actually happens — walking the aisles with the device in your hand. On a computer it is the same screen, just wider.
2. What you are taking
With the origin confirmed, the screen asks what you are moving. Again you pick the type — product or volume — and scan the code.
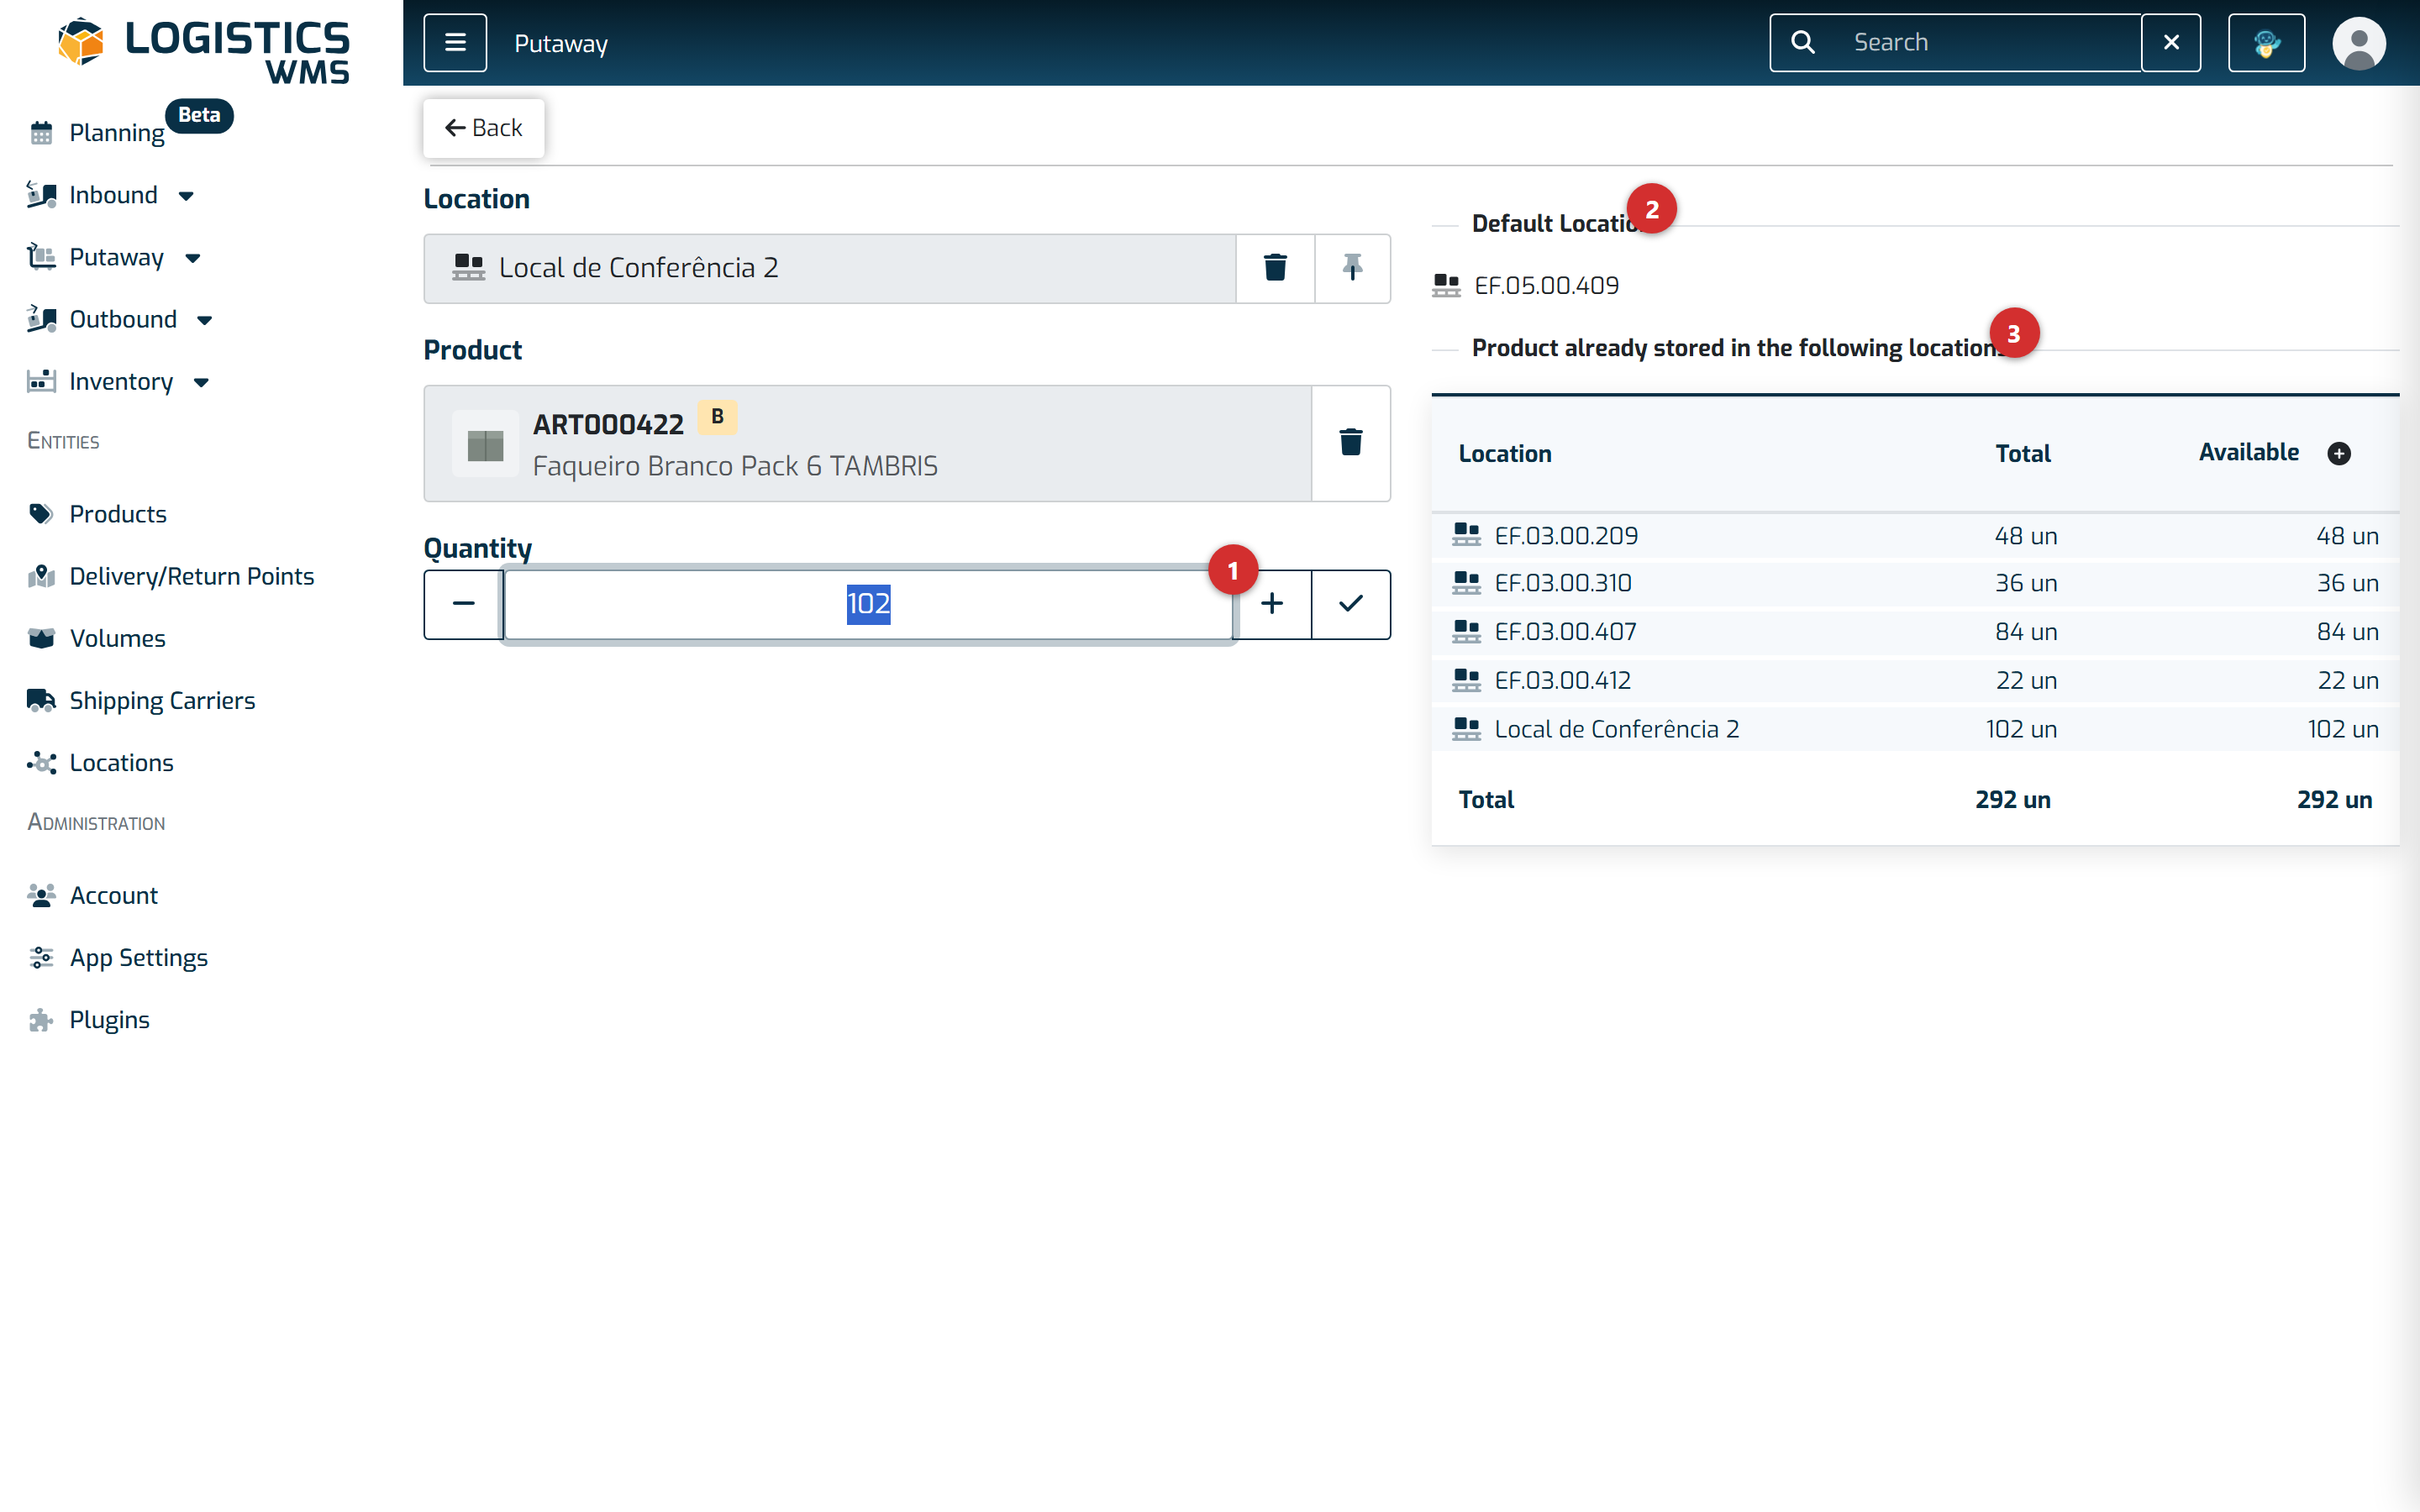
- The quantity comes pre-filled with everything available at that origin. Change it if you are only moving part of it.
- The default location is that product's usual home, when one is set. It is a suggestion, not a rule — you can put it somewhere else.
- Product already stored in the following locations shows where that product already sits, with quantities. It is the most useful thing on this screen: it tells you whether to consolidate everything in one place or keep it separate.
3. Where it goes
One answer left. Enter the destination, again choosing whether it is a location or a volume, and confirm.
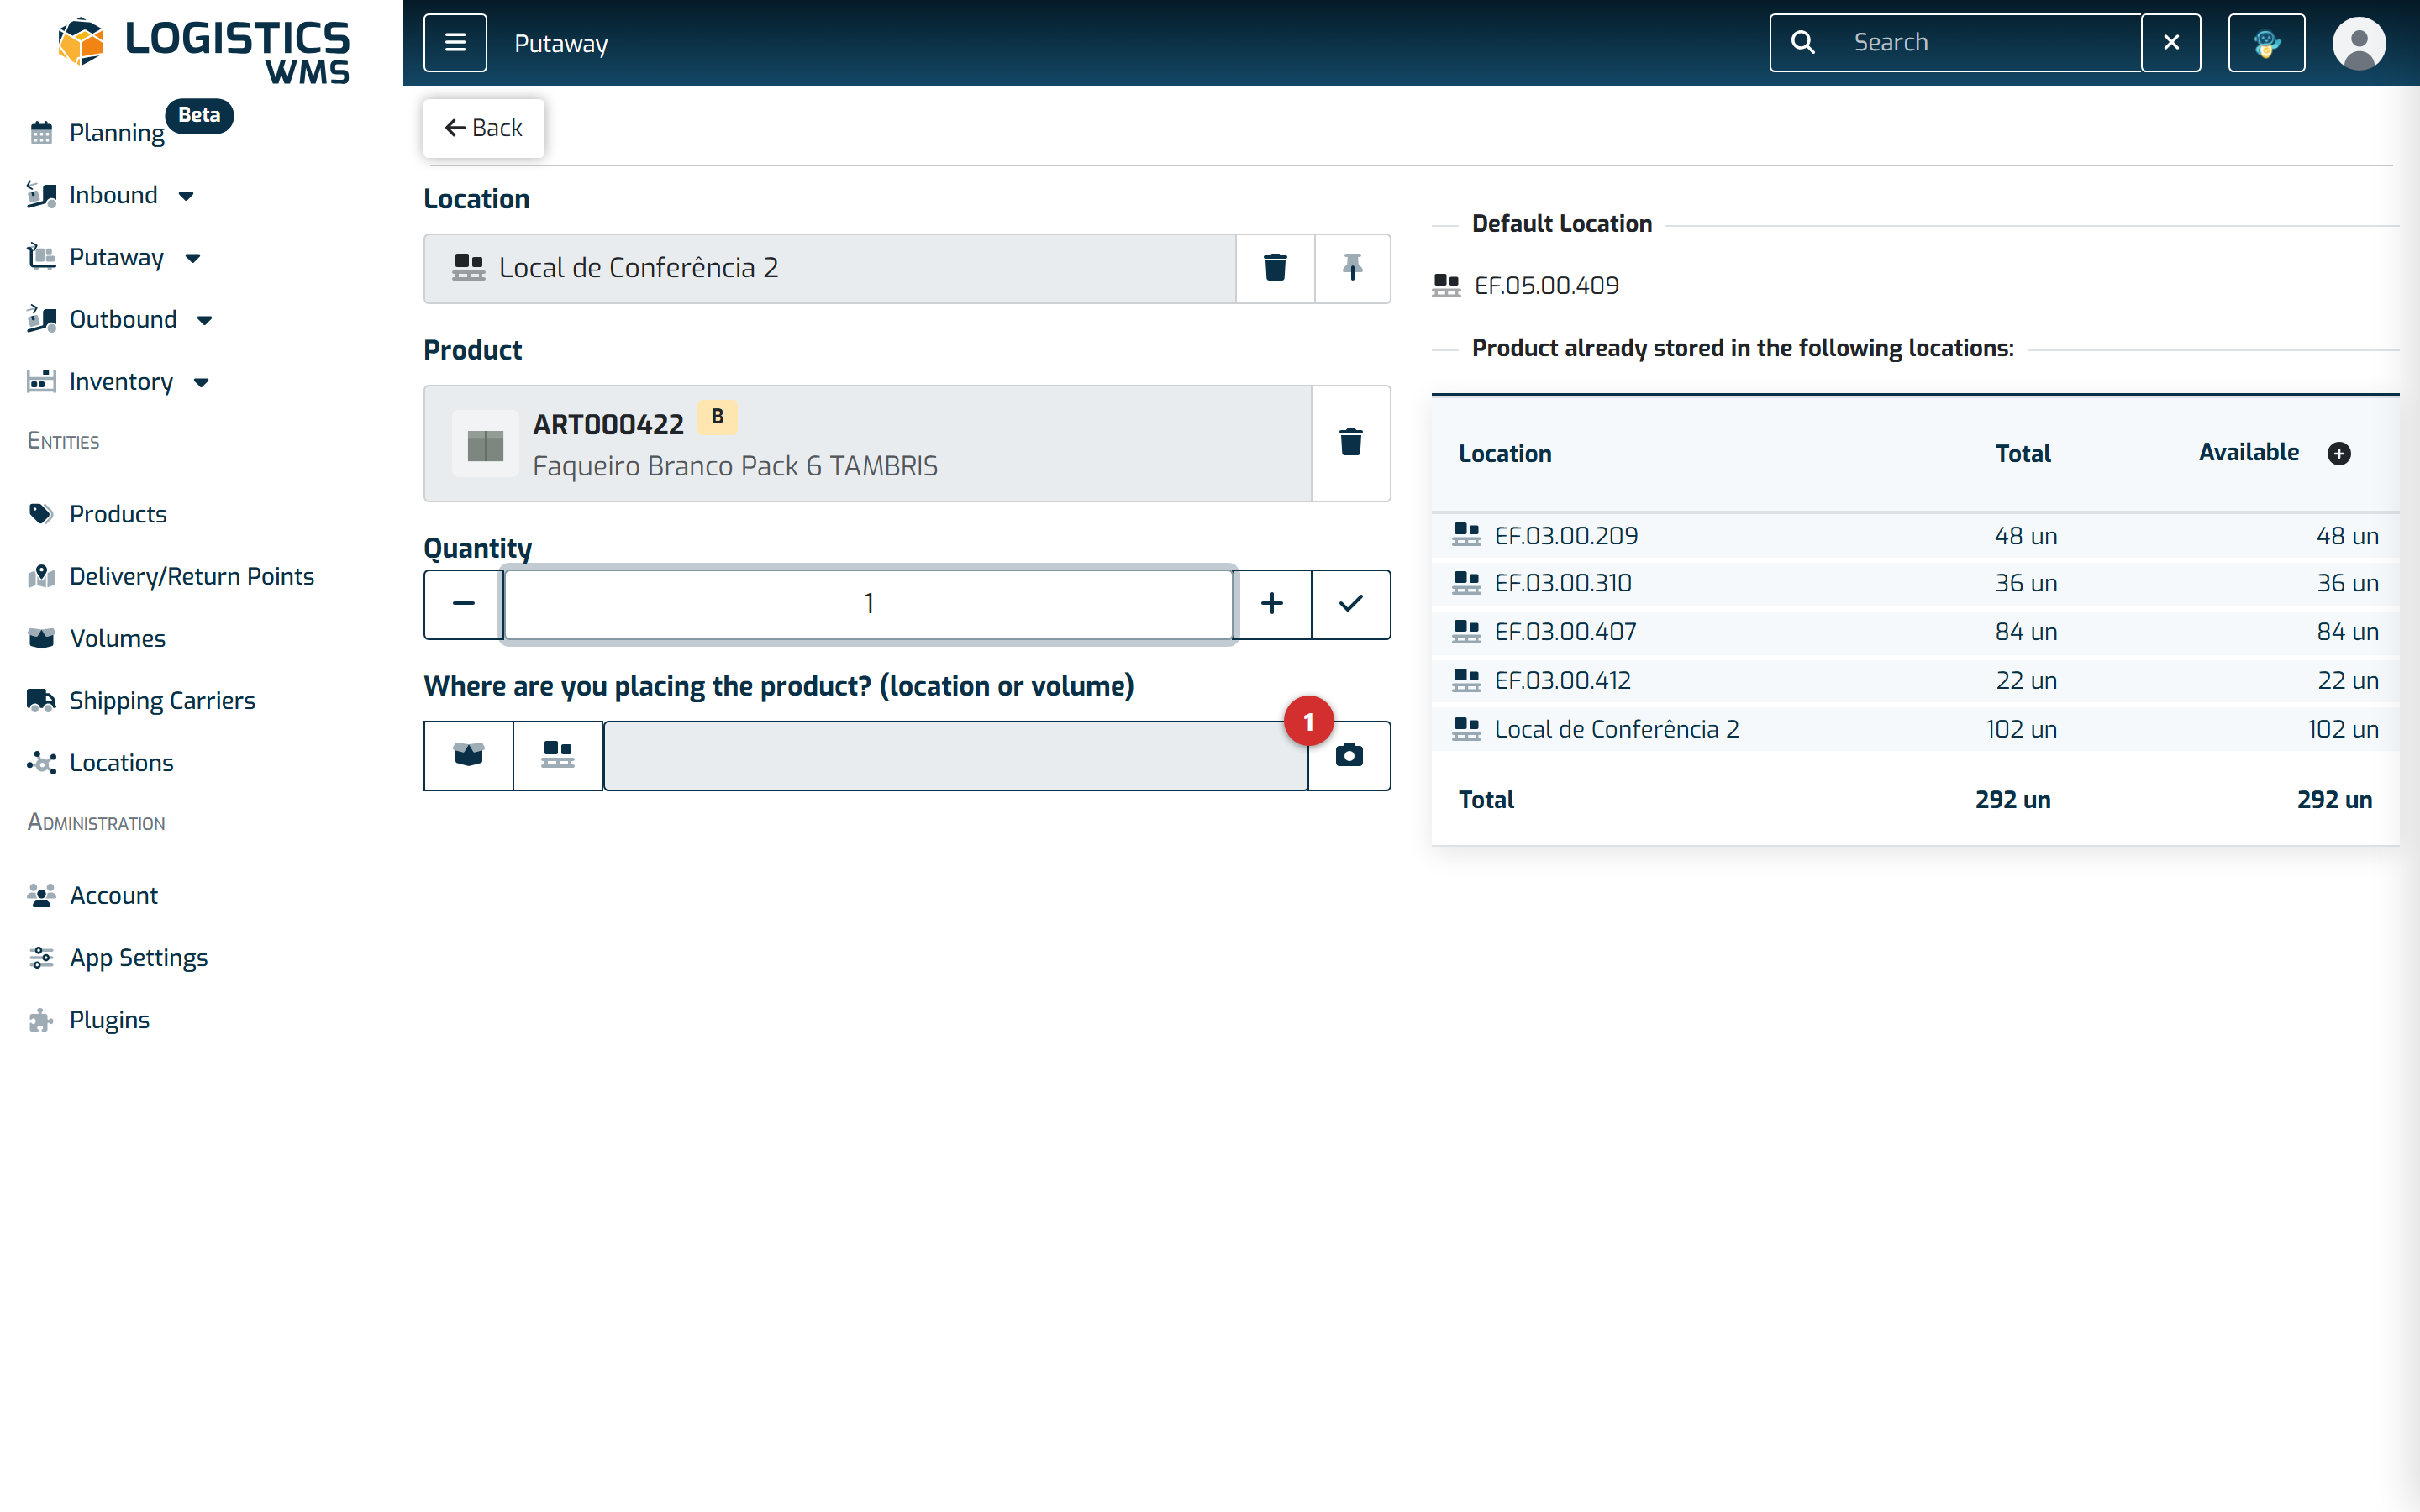
- The destination field takes the code of a location or of a volume, exactly like the origin one.
Notice that the origin, the article and the quantity all stay on screen while you enter the destination, and so does the panel on the right — you can check everything without going back.
The stock moves immediately: out of the origin, into the destination, with the movement recorded in the product's history.
Pinning the origin or the destination
Next to the origin and destination fields there is a pin icon. Pinning one keeps that code from one putaway to the next.
This is what makes the difference when there is a whole pallet to put away. Pin the unloading location as the origin and from then on you only scan the product, the quantity and the destination for each one — one scan saved on every round.
It works the other way round too: if you are filling a pallet, pin the destination and scan only the origins.
If you work with several clients
In a 3PL warehouse every movement belongs to the client who owns the goods. Select the client in the top bar before putting anything away — with "All Clients" selected the application cannot tell whose movement it is, and it refuses the operation with a message asking for exactly that.